
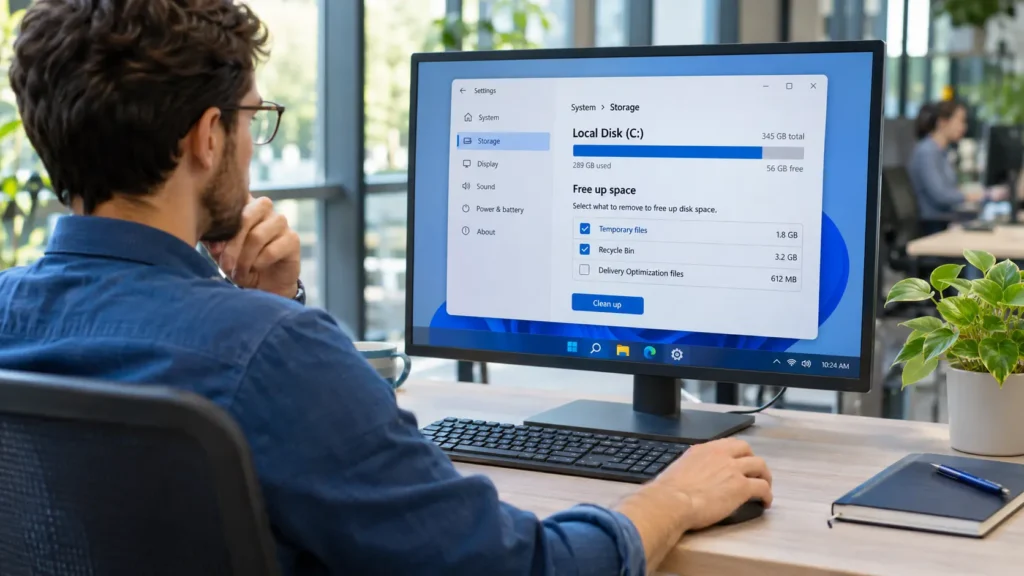
A low-storage warning does not mean you need to start deleting documents or buy another drive immediately. Windows includes tools that can remove temporary files, cached data, and certain leftover installation files.
To run Disk Cleanup, search for it in Start, select your Windows drive, review the file categories, and confirm the items you want removed. For another built-in option, open Settings > System > Storage > Temporary files. Review the selections carefully before deleting anything.
The important part is deciding what to keep. Downloads may contain your only copy of a document, the Recycle Bin may hold something you still need, and previous Windows installation files can provide a way to undo an upgrade.
This guide covers Windows 11 and Windows 10. Menu wording can vary by build and display language. Windows 10’s standard free support ended on October 14, 2025; cleaning storage does not change its support status.
Check What Is Taking Up Space First
Open File Explorer > This PC and check the available space on the affected drive, usually Local Disk (C:). Write down the free-space figure so you can check the result afterward.
Next, open Settings > System > Storage. Let the categories finish calculating and look for the largest areas, such as installed applications, temporary files, or personal files.
This helps you choose a useful next step. For example, if temporary files account for 800 MB but your video projects occupy 60 GB, repeated cleanup runs will have limited value. Reviewing old video exports is likely to recover more space.
Also check which drive is full. Removing files from D: will not directly increase free space on C:.
Your Checklist Before Deleting Anything
Before starting:
- Save your work and close applications.
- Finish any active software installation.
- Back up documents, photographs, and project files you cannot replace.
- Open Downloads and move anything important to an appropriate folder.
- Review the Recycle Bin and restore items you still need.
- Decide whether you may need to reverse a recent Windows upgrade.
- On a work computer, follow your organization’s retention rules.
Treat a cleanup screen as a list of choices, not a recommendation to select every box.
How to Use Disk Cleanup in Windows 11 and Windows 10
The classic Disk Cleanup utility is useful for a deliberate, one-time cleanup.
Step 1: Open the Utility
Open Start, type Disk Cleanup, and select the application.
If prompted, choose the drive you want to clean. Select C: when you are addressing low space on your Windows drive.
Step 2: Review the Available Categories
Wait for the scan to finish. Select a category to read its description, then check only the categories you understand and want removed.
The available entries depend on your computer. You may see temporary files, thumbnails, internet cache, or update-related files.
Step 3: Include System Files When Needed
Select Clean up system files to scan for additional items, such as older Windows Update files. Select the drive again if prompted.
Review the new results carefully. A larger potential saving does not automatically make a category the best choice.
Step 4: Confirm the Cleanup
Select OK, then Delete Files when prompted. Let the operation finish. Microsoft continues to document Disk Cleanup as a built-in method for removing temporary and system files.
Which Cleanup Categories Should You Select?
The descriptions shown on your own PC are the best guide to the exact items available. Use these distinctions when reviewing them:
| Category | What to consider before removing it |
|---|---|
| Temporary files | Start here after saving work and closing applications. Skip anything Windows reports as in use. |
| Temporary Internet Files | Cached web content; removing it may require content to download again. |
| Downloaded Program Files | A legacy category for downloaded web components. It is different from your personal Downloads folder. |
| Recycle Bin | Contains files already marked for deletion. Review them before emptying it. |
| Downloads, if offered | May contain documents, installers, photographs, and archives you intentionally saved. |
| Previous Windows installation(s) | Removing these files eliminates the built-in option to return to the previous Windows version. |
Microsoft’s cleanup documentation distinguishes cached program files from personal files and explains that Recycle Bin items remain recoverable there until emptied.
Downloads Are Not Automatically Disposable
A file does not become unnecessary because it is in Downloads.
For instance, a student might store an assignment there after downloading it from email. A business owner might keep invoices or signed forms in the same folder.
Review this folder manually. Move important files before selecting any cleanup option that removes Downloads.
Emptying the Recycle Bin Removes Your Easy Recovery Option
Open the Recycle Bin and check filenames before clearing it. Once emptied, you cannot use its normal Restore command to recover those items.
Do not assume recovery software will rescue a mistake. Keep a separate backup of anything important.
Previous Windows Installations Need Extra Care
After an upgrade, Windows may offer Previous Windows installation(s) for removal. These files can include the Windows.old folder and support the option to return to the earlier Windows version.
Deleting them removes that rollback option. If the upgrade is recent, first check that your essential applications, printer, network connection, and other hardware work properly.
How to Remove Temporary Files Through Settings
You can use Settings instead of the classic utility.
Windows 11
- Open Start > Settings > System > Storage.
- Select Temporary files.
- Wait for the scan to complete.
- Review each selected category.
- Select Remove files.
Windows 10
Open Settings > System > Storage, then select Temporary files under the system drive’s storage breakdown. Review the categories before choosing Remove files. The layout can differ between Windows 10 builds. Microsoft Support
Windows 11 also provides Settings > System > Storage > Cleanup recommendations, where you can review suggestions involving temporary files, large or unused files, cloud-synced files, and unused apps.
“Unused” does not necessarily mean unimportant. An annual accounts spreadsheet or archived client project may be rarely opened but still worth keeping.
You do not need to run every cleanup interface in sequence. Their results can overlap, so the second tool may find little additional space.
Set Up Storage Sense for Ongoing Maintenance
Storage Sense automates selected cleanup tasks. It is useful when temporary files repeatedly accumulate, but its deletion settings deserve a careful review.
On Windows 11, open Settings > System > Storage > Storage Sense. On Windows 10, look for Configure Storage Sense or run it now on the Storage page.
Review:
- How often cleanup runs.
- Whether unnecessary temporary files are removed.
- How long Recycle Bin items are retained.
- Whether Downloads are automatically deleted.
- How locally available cloud content is handled.
For a cautious starting point, leave Downloads cleanup set to Never and choose a Recycle Bin retention period that gives you time to notice mistakes.
Storage Sense manages the system drive, usually C:. Microsoft also notes that Downloads and cloud content are not managed under its default cleanup behavior unless configured.
On managed office or school computers, an administrator may control these options through policy. Ask IT about unavailable settings instead of trying to bypass them.
Free Local OneDrive Space Without Deleting Cloud Files
If OneDrive files occupy a large part of your drive, you may be able to remove their downloaded copies while keeping the cloud versions.
After confirming synchronization is complete:
- Open your OneDrive folder in File Explorer.
- Right-click a file or folder you do not need offline.
- Select Free up space.
The content becomes online-only and needs an internet connection when you open it again. Choose Always keep on this device for files you need while traveling or working offline.
Free up space and Delete have different consequences. Deleting an item inside a synced OneDrive folder can delete it from OneDrive and other synced devices. Making it online-only preserves the cloud file.
For example, keep this week’s presentation available locally while making completed projects online-only.
Troubleshoot Common Disk Cleanup Problems
Windows Says a File Is Still in Use
Save your work, close applications, and try again. If necessary, restart the computer and repeat the cleanup before reopening your usual programs.
Skip locked files rather than forcing deletion. Some temporary files support active processes and cannot be removed immediately. Microsoft’s temporary-file guidance explicitly advises skipping files that are in use.
Cleanup Recovers Very Little Space
Return to the storage breakdown and investigate the largest category.
Possible next steps include reviewing old recordings, removing duplicate exports, transferring archives to external storage, or uninstalling applications you no longer use.
For application removal, use Settings > Apps > Installed apps on Windows 11 or Apps & features on Windows 10. Avoid deleting application folders manually.
Before removing local originals after a transfer, open several files from the destination and confirm the copy succeeded. Moving your only copy to an external drive is a relocation, not a backup.
Storage Fills Up Again Quickly
Note how much space is available immediately after cleanup, then check again after your normal work session. Look for a connection with downloads, cloud synchronization, recordings, or a particular application.
Microsoft identifies a specific case where Microsoft Store .appx files repeatedly fill the Temp folder. For that problem, its guidance includes clearing the Store cache with Windows + R > wsreset.exe, troubleshooting Windows Update, and restarting.
Repeated deletion will not solve an application that continually recreates excessive files. Identify the source and address that behavior.
If someone you trust is helping remotely, Chrome Remote Desktop setup guide explains access and support options. Stay involved and review proposed deletions yourself.
Windows Update Still Needs More Space
Follow the space requirement shown by Windows Update. Requirements vary, so there is no single cleanup target that fits every update.
When offered, external storage can help an update complete, although Windows may still require some free space on the internal drive.
Confirm the Result
Return to File Explorer > This PC and check the same drive you measured earlier.
For example, moving from 3 GB free to 11 GB free means you recovered approximately 8 GB. Your result may differ from the cleanup estimate because Windows and applications continue writing data.
Then retry the task that triggered the warning, such as saving a project or installing an update. Check that important files remain accessible.
The goal is enough usable space for your work, not an empty temporary-files category.
FAQs
Will Disk Cleanup Make My Computer Faster?
It may help when storage is critically low. It will not automatically fix a slow processor, insufficient RAM, or an application problem. Low storage is only one possible cause of poor performance.
Is Disk Cleanup the Same as Defragmentation?
No. Cleanup removes selected files. Drive optimization performs storage maintenance; Windows handles hard drives and SSDs differently. It does not replace reviewing unnecessary files.
Does Disk Cleanup Format the Drive?
No. Formatting is a separate operation that prepares a volume for use and can remove access to its existing contents. Do not format a drive to address an ordinary low-space warning.
How Often Should I Clean My PC?
Review storage when warnings appear and after large downloads or projects. A monthly check is a reasonable starting habit; adjust it to your workload.
Do I Need a Third-Party Cleaner?
Built-in tools are enough for routine temporary-file cleanup. Start with them and investigate large applications or personal files if you still need space.
Final Words
Start by checking what occupies your drive, then remove only categories you understand. Review Downloads and the Recycle Bin, preserve upgrade rollback files when needed, and verify the result afterward. If storage keeps filling up, find what is creating the files. A small change to downloads, project archives, or cloud settings can be more useful than repeatedly running cleanup.